
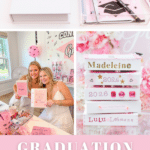
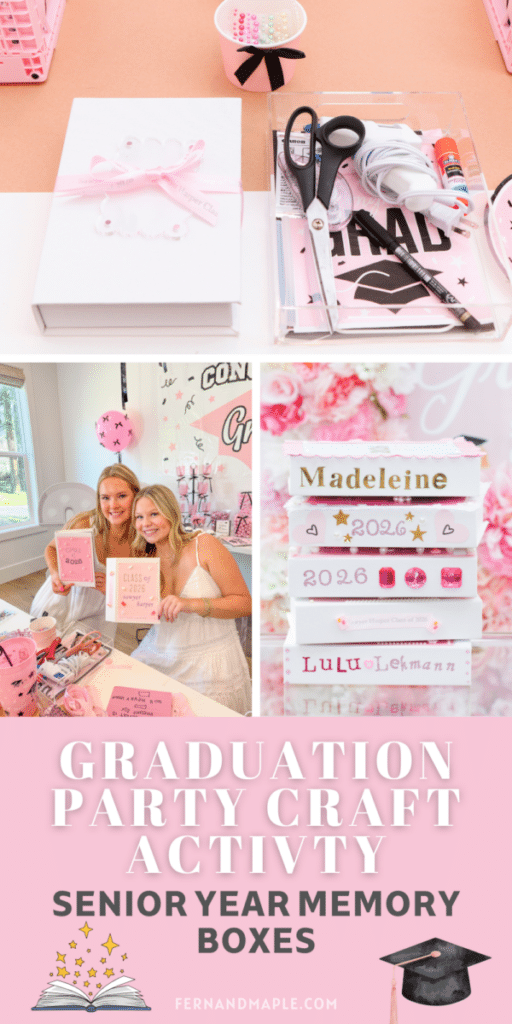
If you’re planning a graduation party craft activity that goes beyond the standard games and gives your grad and her friends something genuinely meaningful to take home — this is the one. Senior year memory boxes that each girl decorates and personalizes herself. Set-up and styled with a full craft station that made the whole activity feel like an event rather than just a table with some supplies on it.
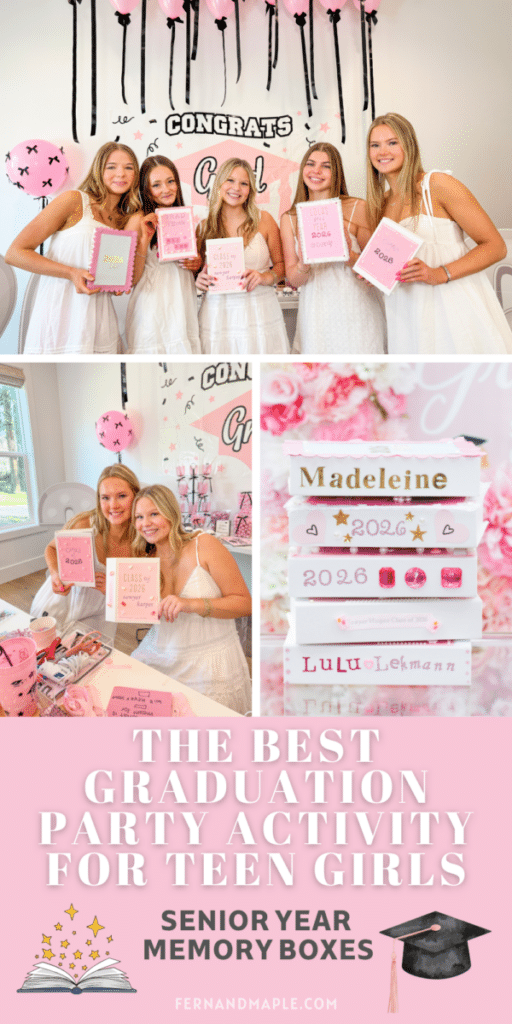
I set this activity up for Sawyer’s pink and black 2026 graduation party, and it was hands down the most talked-about part of the celebration. The girls were hooked from the moment they unwrapped their boxes.
From blank boxes, personalized ribbon and stickers, to stamps, papers and gems — you’ll find my full shopping list for all the craft supplies you need HERE.
Here is exactly how I set it up..
Watch the Full Tutorial
Before we get into the step-by-step, here is the full video so you can see exactly how the craft station comes together from start to finish. Sometimes seeing it in motion makes all the difference!
Don’t forget to save this post for later — and follow along at fernandmaple.com for more DIY party ideas and party inspiration!
Why a Craft Activity Works So Well for a Graduation Party
First, let me make the case for building a craft activity into your graduation party — because it’s not just a fun idea. It is genuinely the thing that makes the party memorable long after the cake is gone.
A well-designed craft activity gives every guest something to do from the moment they sit down. Additionally, it removes the awkward standing-around period that happens at most parties while everyone waits for things to start. Each girl leaves with something she made herself — something personal, something she’ll actually keep. Furthermore, it gives the group a shared experience that becomes a memory in itself, not just a party detail they’ll forget by next week. Photos they took during the party were used on the boxes and were stored in the boxes for years to come. So, for Sawyer’s party, the memory box craft activity hit every one of those marks. The girls were still be talking about their boxes weeks later.
What You’ll Need for the Craft Station
For the Memory Boxes
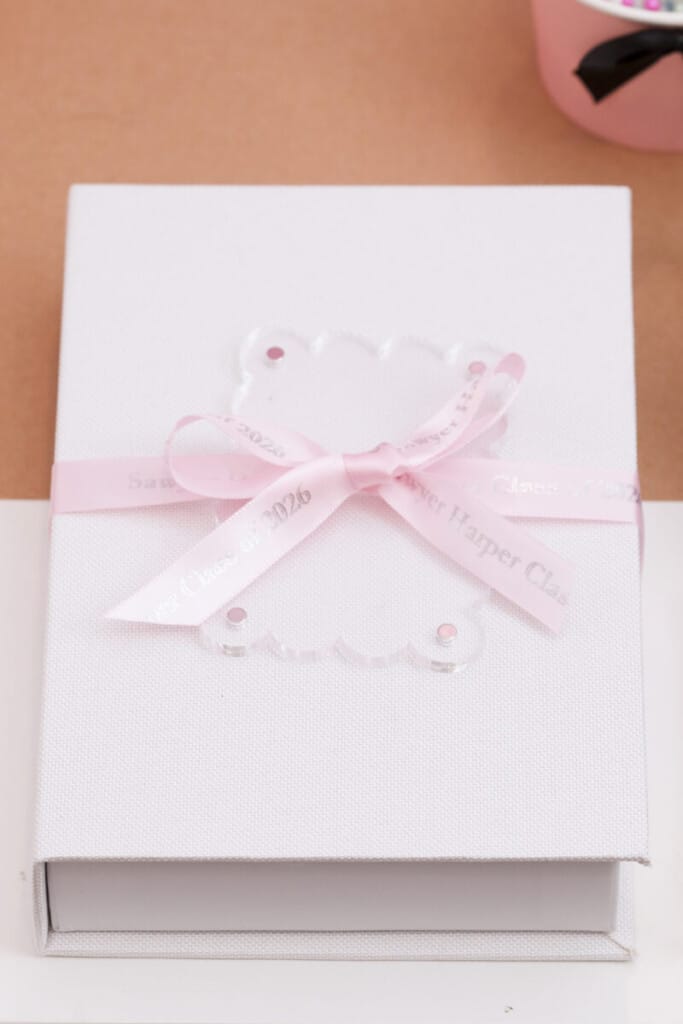
- Book-themed craft boxes — one per guest
- Personalized ribbon — tied around each box
- Photo printer & printer paper – to add photos to the boxes
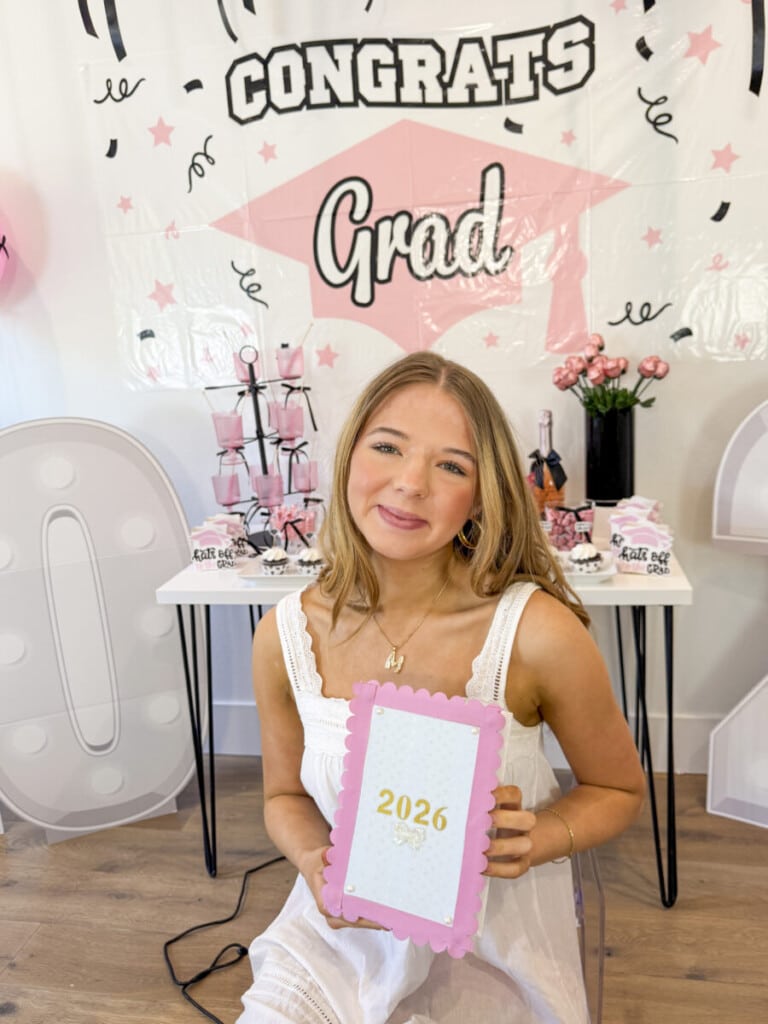
- DIY photo frames — one per box, tied onto each box as a separate craft element. Check out the full party activity post HERE
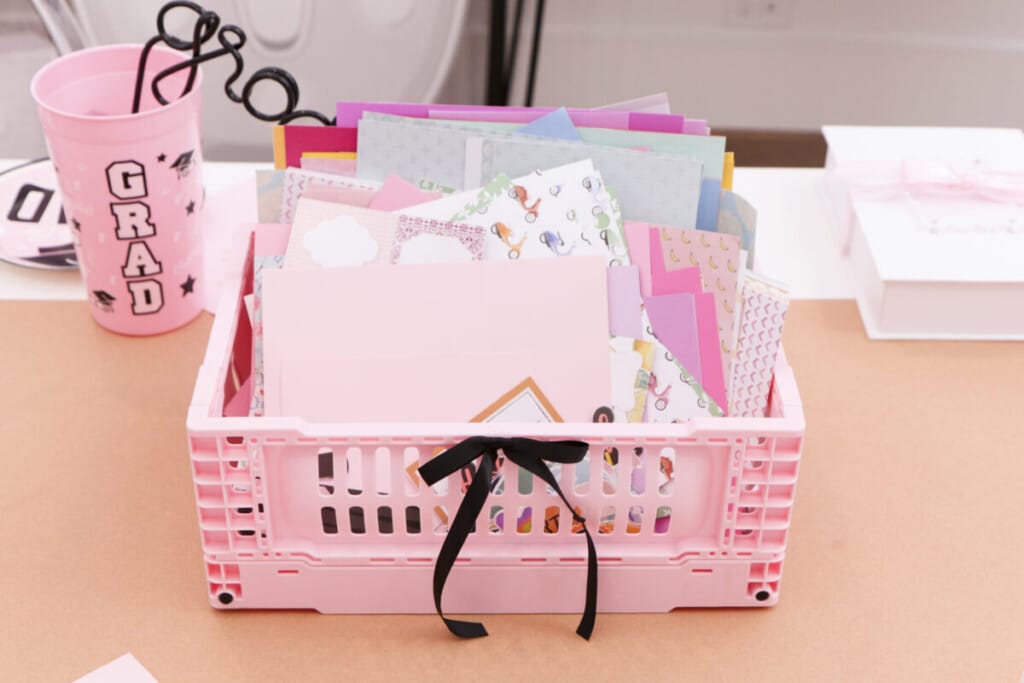
Shared Supplies — Crates at the Center of the Table
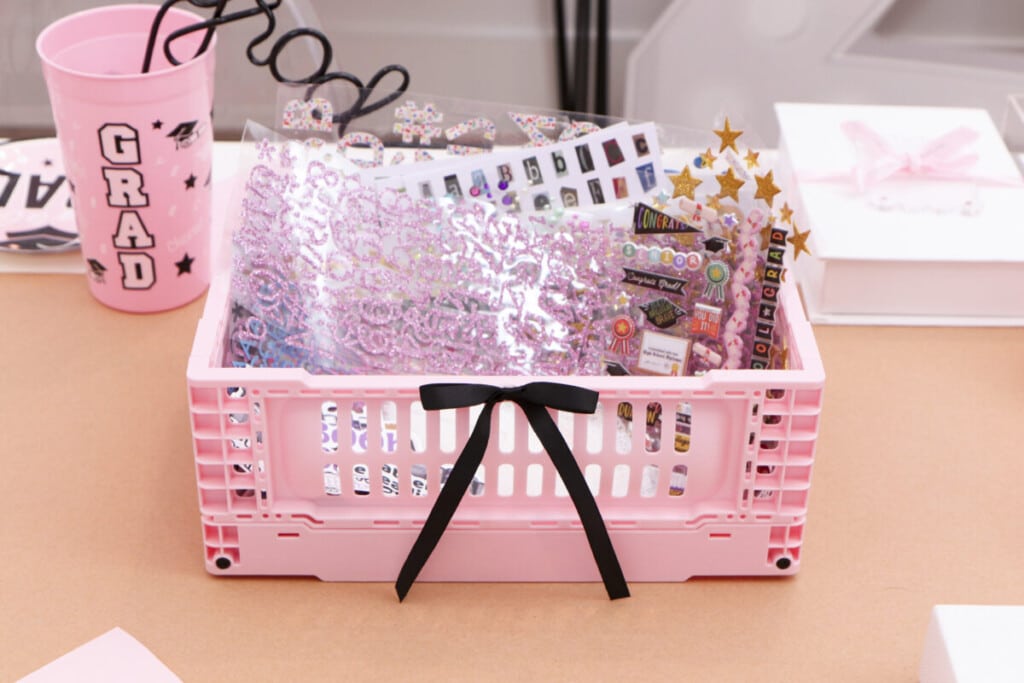
- Letter and number stickers
- Stamps and ink pads
- Card stock and decorative papers
- Flat back charms
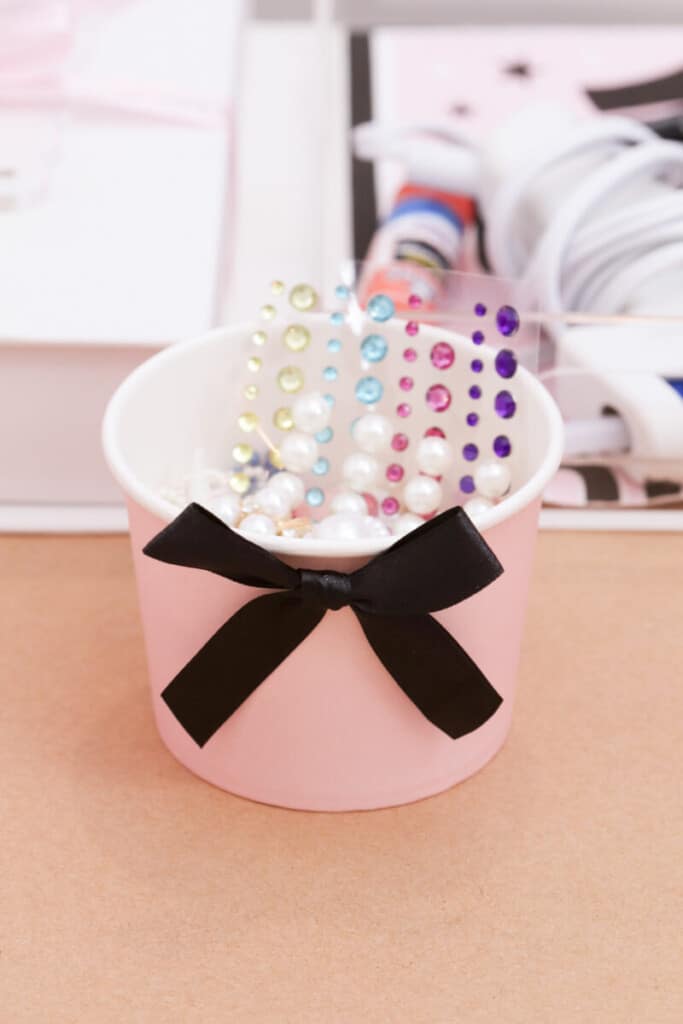
- Gem stickers
I bought many of my supplies by shopping the aisles of Michaels. I have a selection of my favorite supplies from Michaels and Amazon HERE.
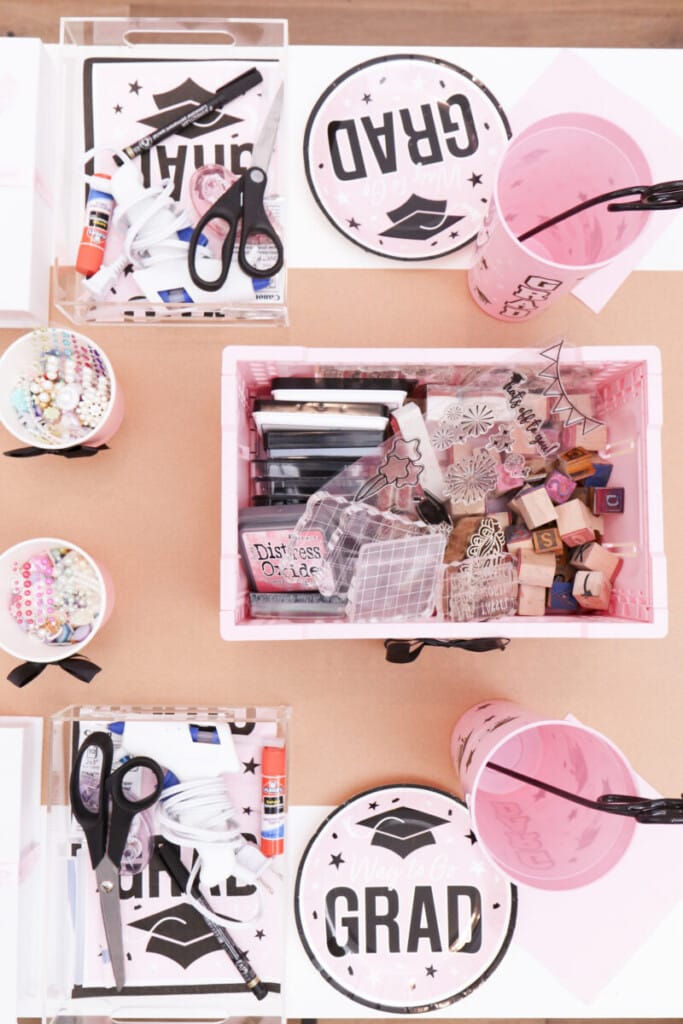
Individual Place Setting — Acrylic Tray Contents
- Glue sticks
- Hot Glue Gun
- Scissors
- Pens and markers
- Double sided tape
- Pink grad napkin to line the acrylic tray
- Acrylic tray
How to Set Up the Craft Station
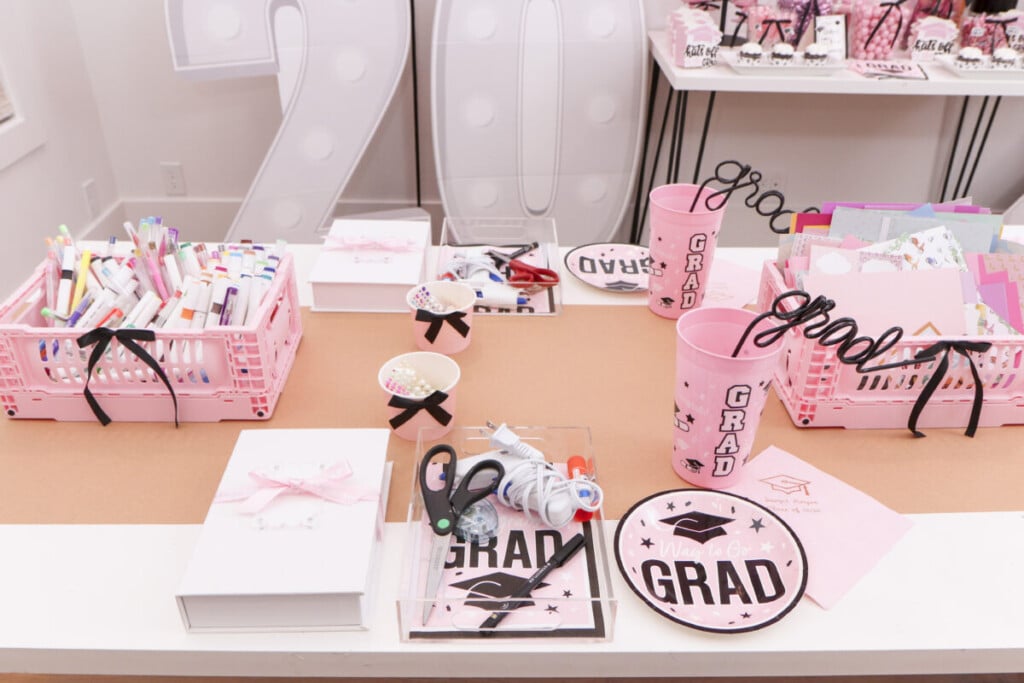
Step 1 — Set Up the Individual Place Settings
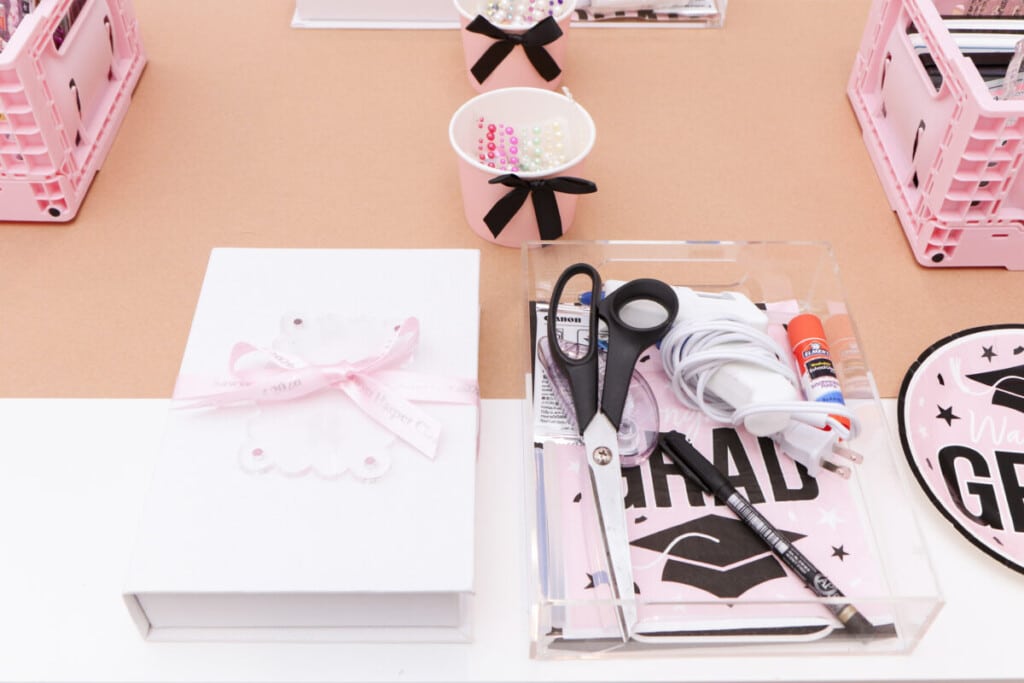
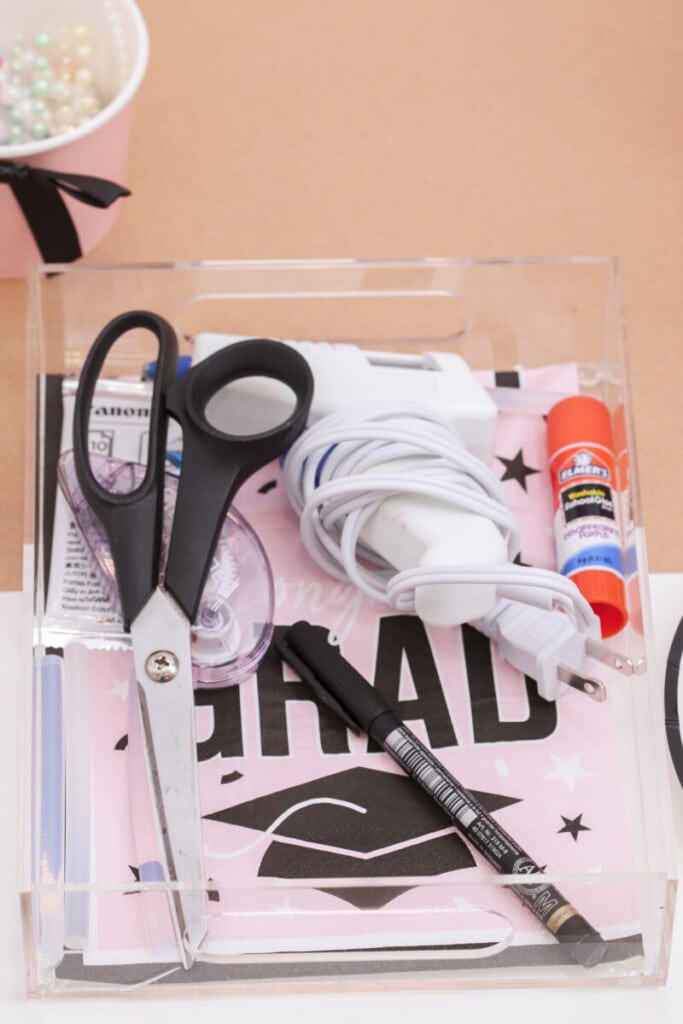
First, line each acrylic tray with a pink grad napkin — this small detail makes each place setting look intentional and styled rather than just functional. Next, fill each tray with the individual supplies: glue sticks, hot glue gun, scissors, pens and markers, and double sided tape. Everything they will use over and over again. Place one tray at each seat before the girls arrive so everything is ready when they sit down.
Step 2 — Prepare and Place the Memory Boxes
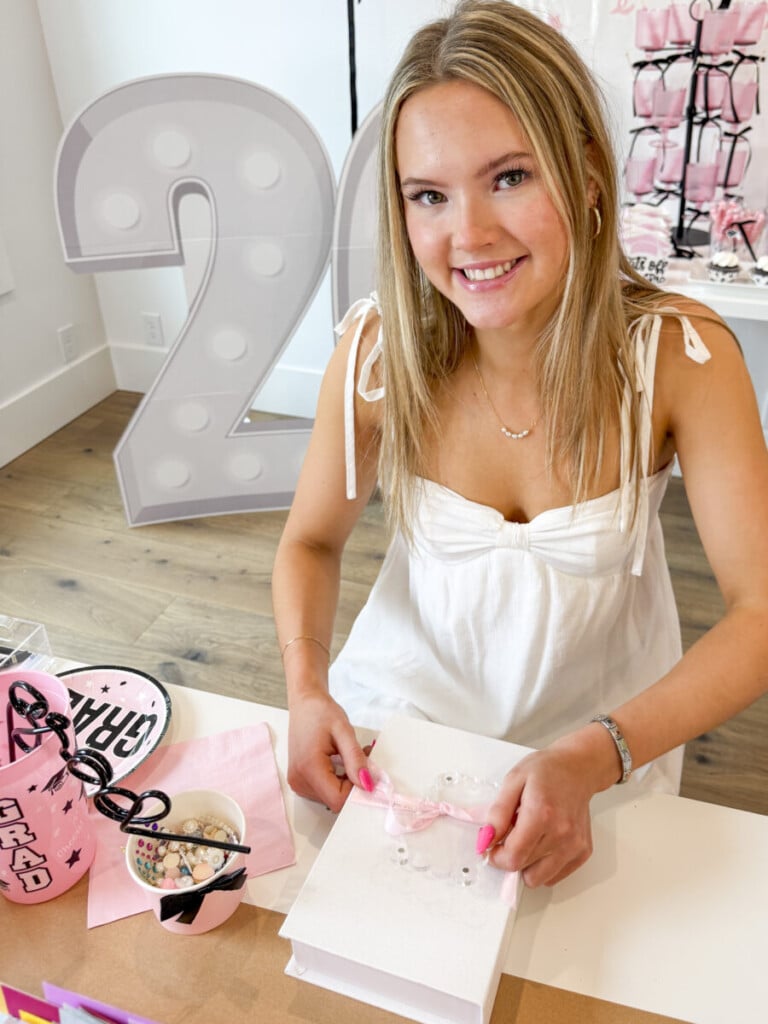
Next, prepare each book-themed memory box before the party. Wrap each box with personalized ribbon and tie the DIY photo frame onto the front using the ribbon tails. Place one box beside each individual tray at the place settings. The ribbon acts as the wrapping — each girl unwraps her own box to reveal it, which creates a lovely gift-opening moment right at the start of the activity
Step 3 — Set Up the Shared Supply Crates
Then, arrange the shared supplies in crates down the center of the table — grouping supplies by type makes it easy for everyone to find what they need without chaos. I used one crate for letter, grad and number stickers, one for stamps and inks, one for card stock and decorative papers and another for colored markers & pencils. Additionally, I placed smaller containers of flat back charms and gem stickers within easy reach of every seat.
Step 4 — Let the Girls Decorate
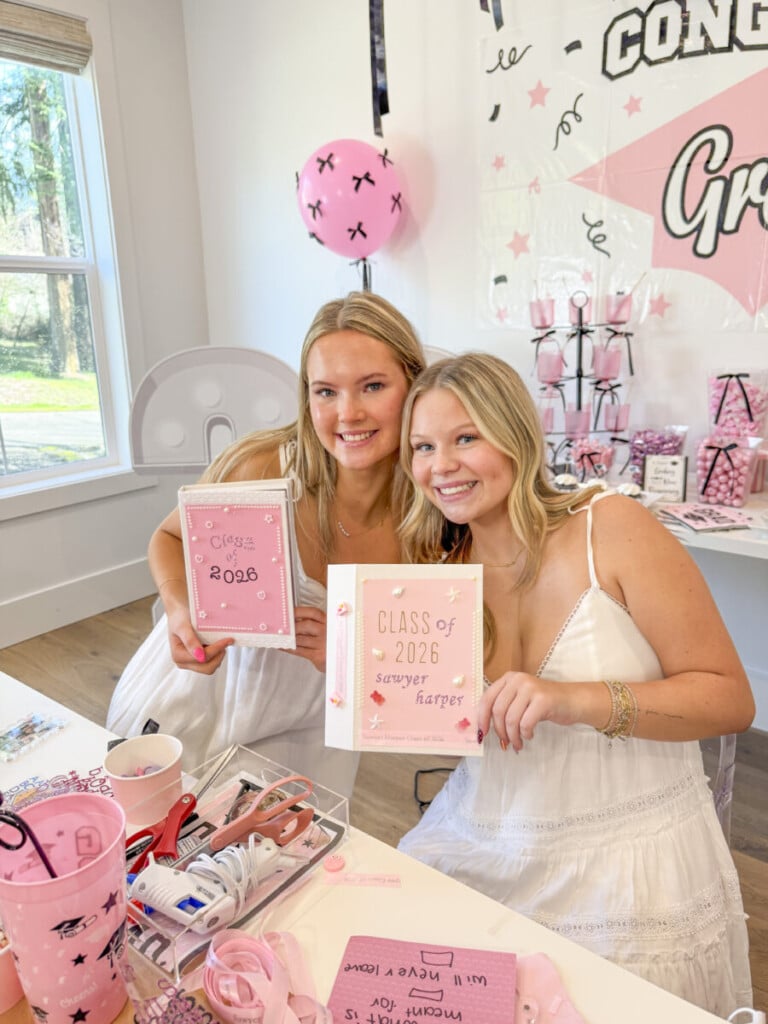
Finally, step back and let the creativity happen. Once the girls unwrap their boxes and see the supplies available, they need very little direction — the activity runs itself. Each girl decorates and personalizes her own box entirely to her own taste, which means every finished box looks completely different. That individuality is exactly the point.
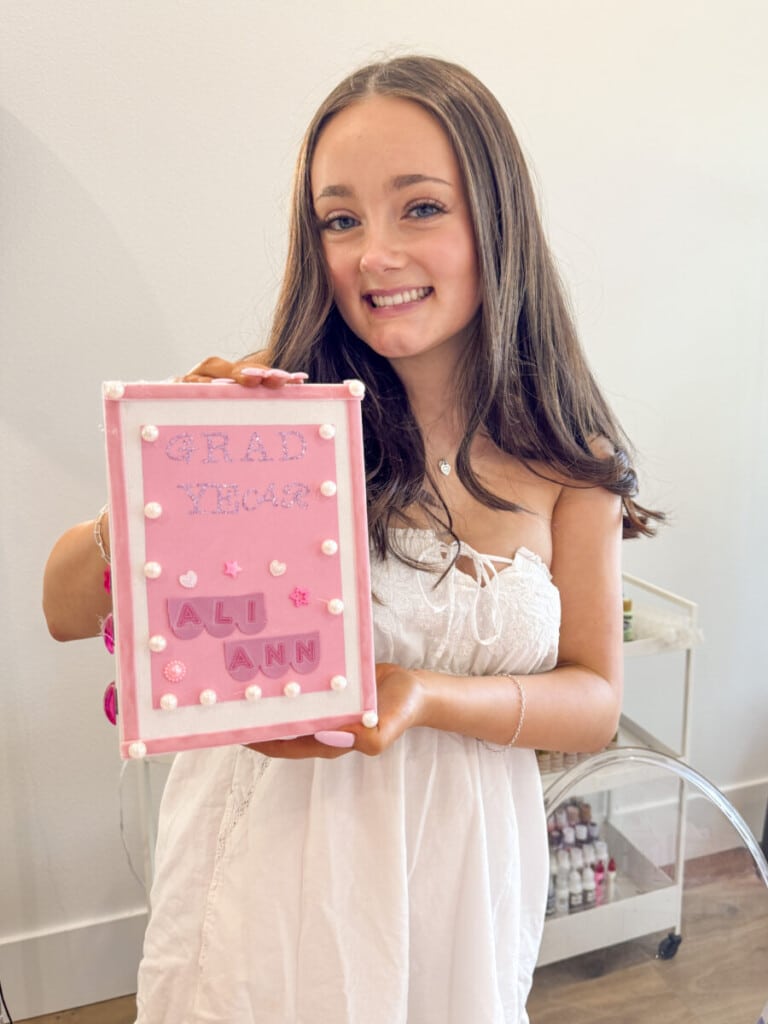
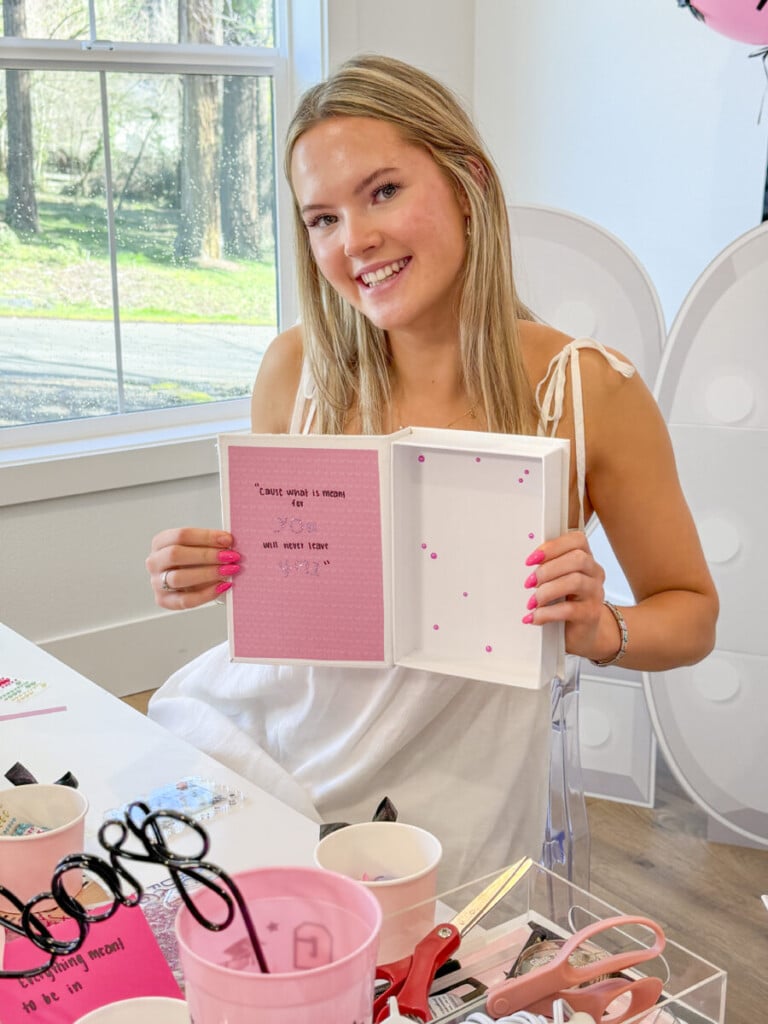
I loved how they didn’t just decorate the front of the boxes. They decorated the spines with names and dates. As well as also decorating the inside flaps with quotes and photos.
For Sawyer’s party I used white book-themed boxes so the girls had a blank slate to work with. There are other colors available.
The Reveal — Finished Memory Boxes
The moment the girls held up their finished boxes was genuinely one of my favorite moments from the whole party. Five boxes, five completely different results — each one a perfect reflection of the girl who made it.
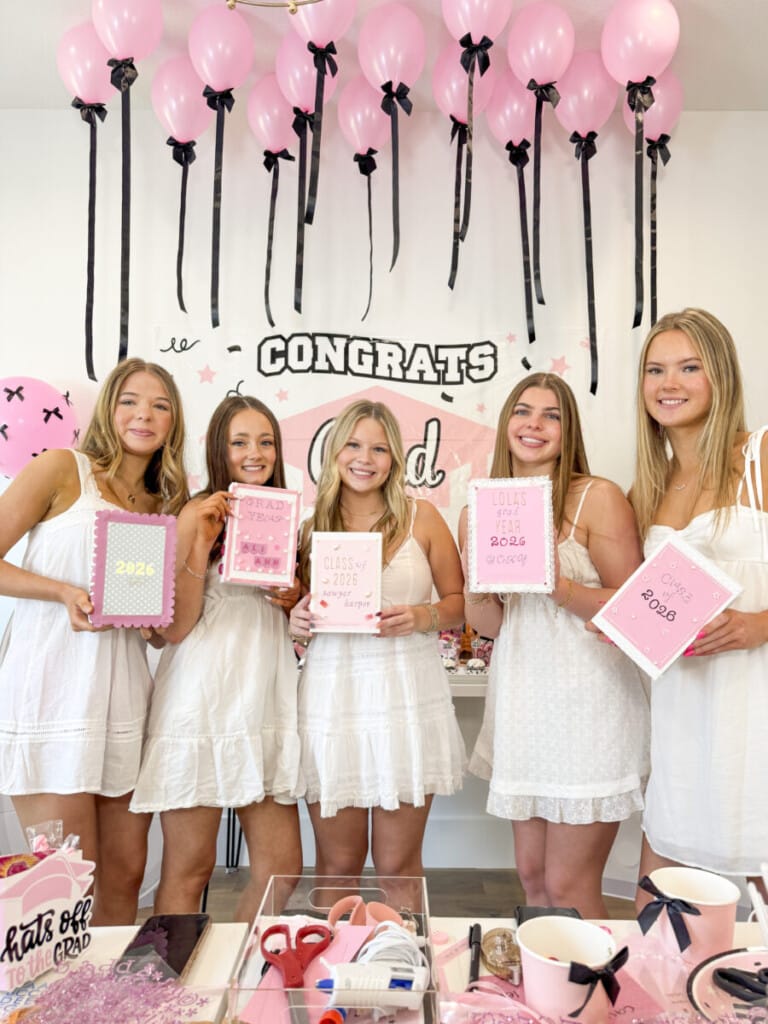
For example, some girls covered their boxes in stickers and charms from edge to edge. Others took a more minimal approach, focusing on a few meaningful details done carefully.
I love how Sawyer used personalized ribbon for her box! Each box was completely unique!
Tips for Running a Smooth Craft Station
Pre-organize everything before guests arrive. The setup should be completely done before the first girl sits down — nothing kills craft party energy faster than waiting for supplies to be sorted out. Additionally, having everything ready signals that this was planned and thought through, which makes guests feel valued.
Use crates to organize shared supplies by type. For example, keep all stickers together, all stamps together, all papers together. This means girls can find what they need without asking and without creating chaos at the supply table.
It helps to line the individual trays with a napkin. It’s a small detail but it makes each place setting look styled rather than just functional. Furthermore, it protects the tray and keeps small items from sliding around while the girls work.
Allow plenty of time. This isn’t a five-minute activity, especially for this age group — the girls at Sawyer’s party spent well over an hour on their boxes. Lots of attention went into the details for creating each box. That said, no one complained. Build at least 60-90 minutes into your party schedule for this activity.
Finally, have extra supplies available. Always have backup stickers, extra gems, and additional paper available in a central location. Some girls will use far more than others — having extras on hand prevents any girl from running out mid-decoration.
Frequently Asked Questions
What is a good graduation party craft activity for teens?
A personalized memory box craft station is one of the best graduation party craft activities for teen girls — it’s hands-on, personal, and every guest takes home something they made themselves. Book-themed boxes (to represent a book of your high-school life, or year book filled with memories) styled with personalized ribbon and a full craft station of stickers, stamps and charms work especially well for senior year celebrations.
How do you set up a craft station for a graduation party?
First, prepare individual place settings with an acrylic tray, personal supplies and the craft item ready to go. Then organize shared supplies in crates at the center of the table grouped by type — stickers, stamps, papers. Finally, make sure everything is fully set up before guests arrive so the activity starts immediately when they sit down.
How many supplies do you need for a memory box craft station?
For a group of five girls, I used approximately five book-themed boxes, four crates of shared supplies including letter stickers, stamps and card stock, plus individual trays with glue, scissors, pens and tape. As a result of having everything pre-organized and within reach, the activity ran completely smoothly without anyone needing to wait.
Where can I buy book-themed boxes for a memory box craft activity?
Book-themed craft boxes are available on Amazon — I’ve linked the ones I used in the supply list above as well as alternatives. There are other colors and sizes available. Additionally, craft stores like Michaels often carry plain wooden or paper mache boxes that can be decorated to look like books with a little paint and ribbon.
Can this craft activity work for a smaller or larger group?
Yes — this graduation party craft activity scales easily. For a smaller group of 2-3 girls, reduce the number of boxes (you can buy the boxes in differing quantities, 1, 3, 6, 12 and more) and supply quantities accordingly. For a larger group, however, add more crates of shared supplies and ensure each individual tray is fully stocked so girls don’t need to share personal supplies.
How long does the memory box craft activity take?
Allow 60-90 minutes minimum. However, the girls at Sawyer’s party spent well over an hour and no one was in a rush to finish — the activity naturally holds attention because each girl is making something personal and meaningful to her.
Shop the Craft Station Supplies
Shopping List for this Graduation Memory Box Craft activity

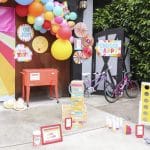
For the full pink and black graduation party this activity was part of — candy bar, floral arch backdrop, personalised details and more — head here: Pink and Black Graduation Party
If you’d like to try out the DIY floral arch backdrop tutorial head here: DIY Floral Arch Backdrop — No Glue, No Wire
A pink candy bar is perfect for a Graduation party, get the how-to on styling one HERE.
You Might Also Like
For more graduation party ideas check out my Baseball-Themed Graduation Party. And for more DIY backdrop ideas head to my 25 Creative Materials for DIY Party Backdrops.
For more graduation party ideas check out my Baseball-Themed Graduation Party. And for more DIY craft party activity ideas head to my Clip Making Party!
Happy Partying!
As a blogger, I sometimes receive compensation and/or products in exchange for my styling and crafting services. I also may earn a small commission from any sales that result from affiliate links on this page. As always, all project ideas and any opinions expressed here are my own. For further information on our disclosure policy please check out our disclosure page.
PIN FOR LATER:
Planning a graduation party craft activity and want to come back to this setup? Save this post to your graduation party planning board so you can find it when you need it.


")


Leave a Reply