
A broom making station might be the easiest way to make a Halloween party feel like an event. Not just a gathering with costumes!
I built my broom making station as part of a full witch party. You can see the potion bar, table setting and dessert bar for my Practical Magic Inspired Witch Party HERE. But it works just as well on its own: a coven-themed girls’ night, a tween sleepover, any Halloween party or get-together where you want people using their hands instead of standing around.
The best bit? Every guest builds her own broom completely from scratch, and no two end up looking the same. They get to leave with a gorgeous piece of Halloween decor they have made themselves.
Let’s go through exactly how it came together — the technique, the supply list, the station setup and the schedule that made it work.
Why Broom Making Works So Well as a Party Activity
A broom making party works so well because it gives everyone something to do with their hands, and something to walk away with.
Unlike a lot of party crafts, there’s no wrong way to build one, so even guests who don’t consider themselves crafty end up with something they’re proud of. It’s also a natural fit for a witch or Halloween theme, since the activity itself needs almost no additional theming to feel intentional.
It also scales well. A broom making party can be the entire event, built around snacks and the craft itself, or it can be one station within a bigger celebration the way it was when I hosted it. Either way, the setup below works the same, so you can adjust the scale without changing the plan.
Watch How the Broom Making Came Together
Before we get into the details heres a reel where you can see exactly how this station worked, from setup to finished brooms. Sometimes seeing it in motion makes all the difference.
What You’ll Need for a Broom Making Party
Here’s the full supply list, whether you’re starting from a pre-made base broom or building your bristle bundle entirely from scratch.
The broom:
- Broom base: Base brooms with or without the bristles already attached, OR a straight branch or sturdy stick
- Broom head bulk: Birch twigs, foraged sticks or dried grass stalks if you’re building the bristle bundle yourself, or for extra fullness either way
Note: You can also forage your local park or woods for sticks and branches of a good length and diameter to use as a base instead.
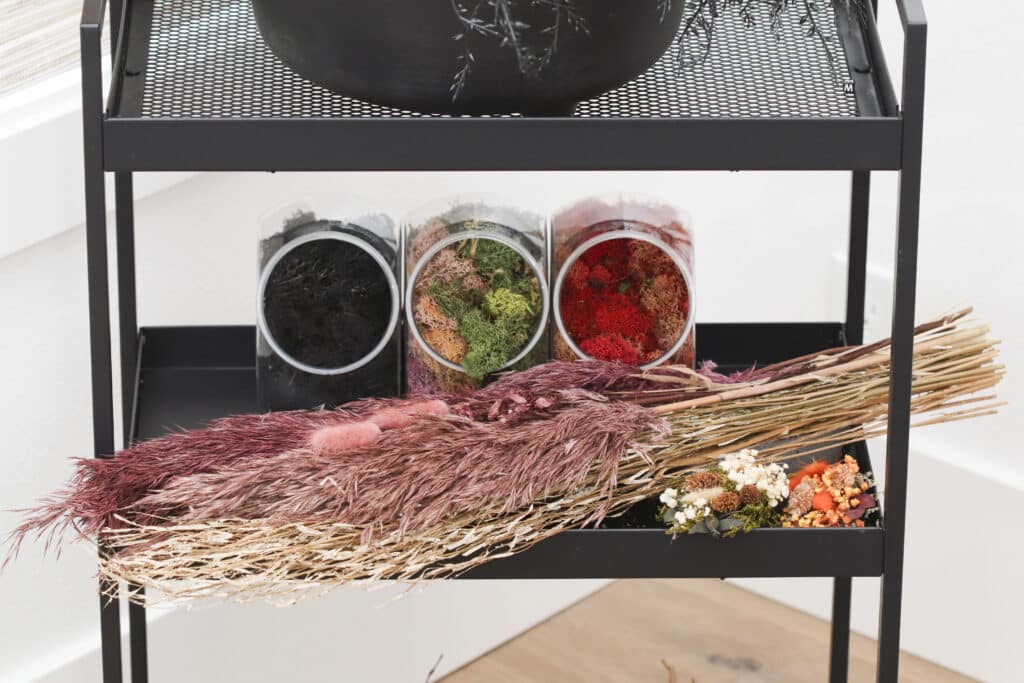
- Greenery and texture: Dried grasses and flowers, faux florals, feathers, moss, and fresh herbs like oregano or tarragon if you want a version that smells good too
The structure:
- Securing: Use floral wire, floral tape, rubber bands or zip ties for bundling bristles and securing them to the broom base
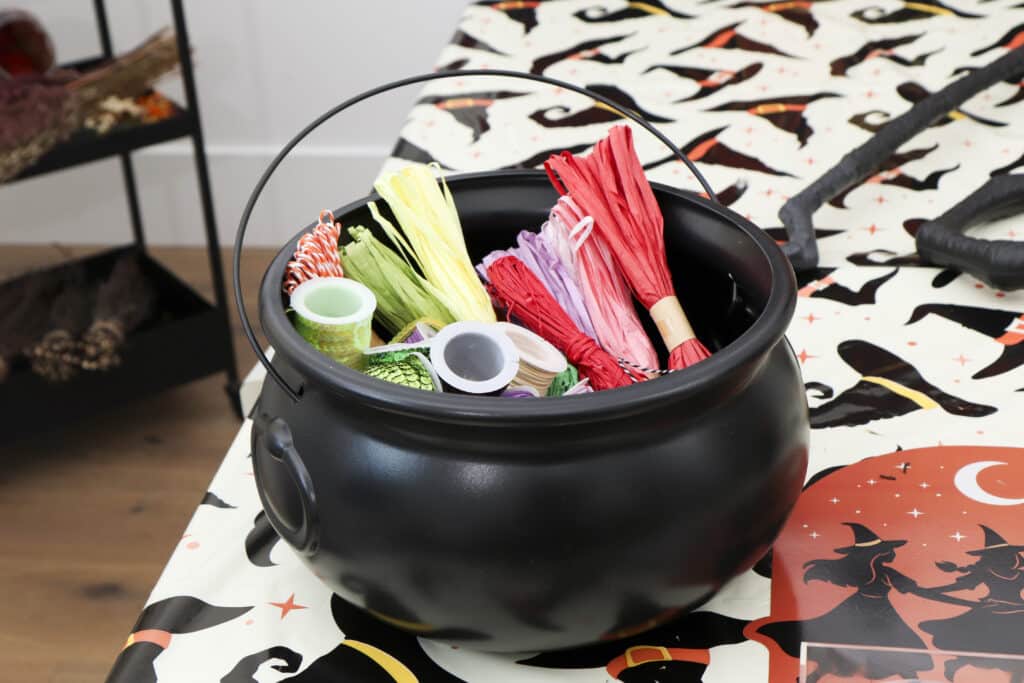
- Wrapping: Twine, rope, jute, leather strips, sequins, raffia, ribbon, lace, tulle or fabric strips for wrapping around the secured area. Use wraps that fit your aesthtic or the overall look you are going for.
Embellishments:
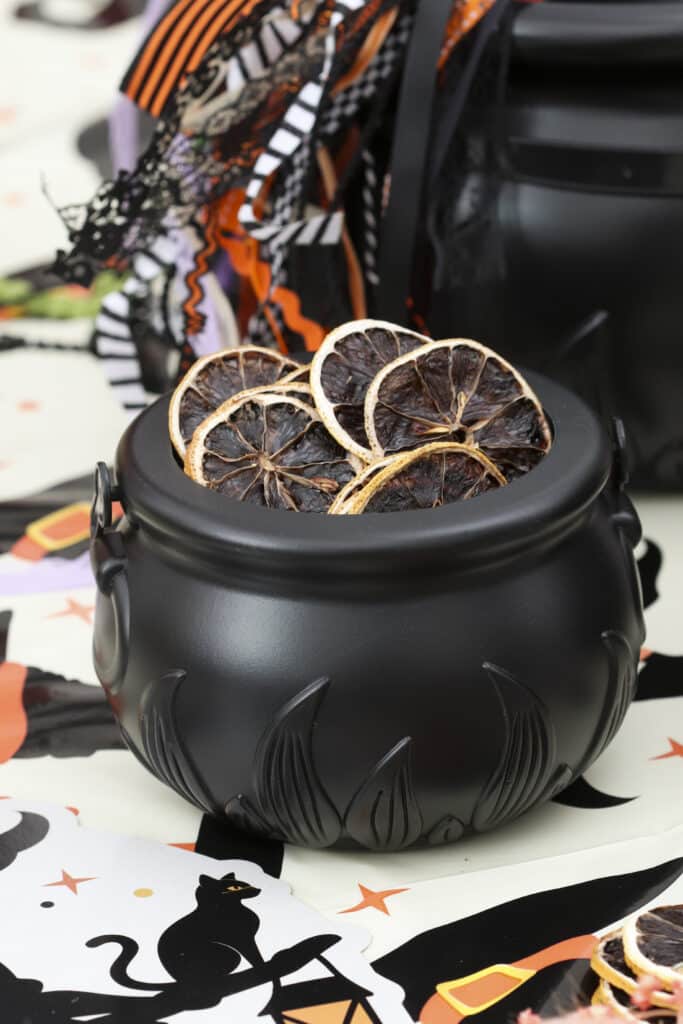
- Small hanging embellishments: Charms, beads, dried fruit, berries, crystals & jewels, or mini signs
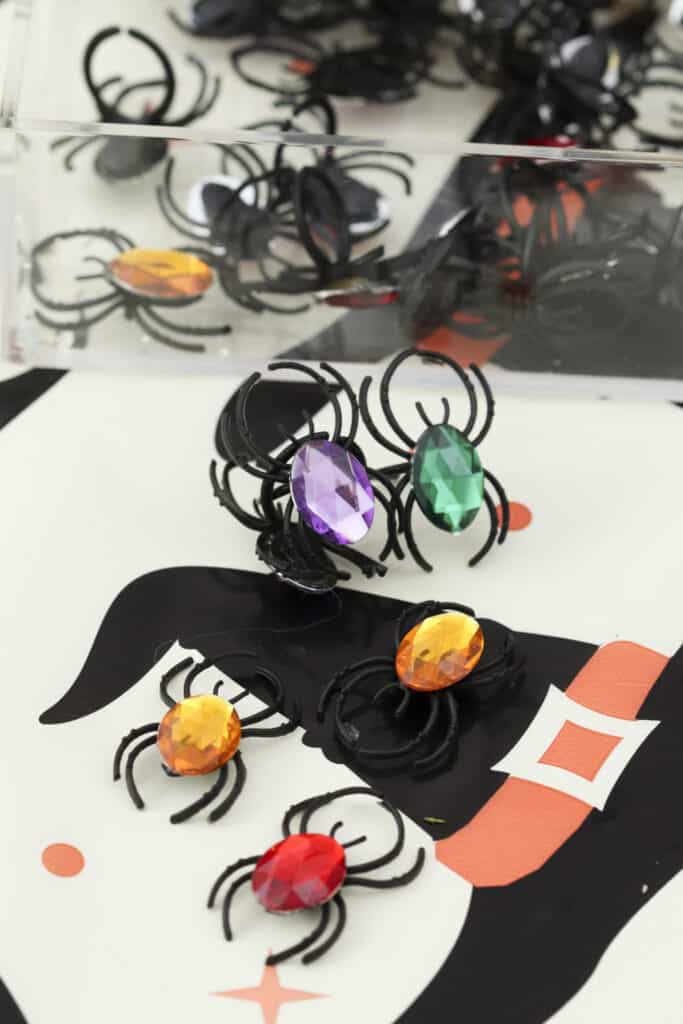
- Finishing touches: Butterflies, spiders, moss, fairy lights, spell pages, a small bell, eye balls, potion vials or pendants (moons or pentacles are perfect!)
Essentials:
- Tools: Scissors or pruning shears, pliers, a hot glue gun, floral wire, floral tape and fishing wire
- Optional extras: A matte floral sealant spray if you want the finished broom to hold up beyond one season, and a hook or stand for displaying it afterward
Theming:
- For the supplies: Witch themed containers to hold crafting supplies. I used a set of nesting cauldrons that worked perfectly on the table. Additional space e.g. a rolling cart to hold supplies to big for the crafting table.
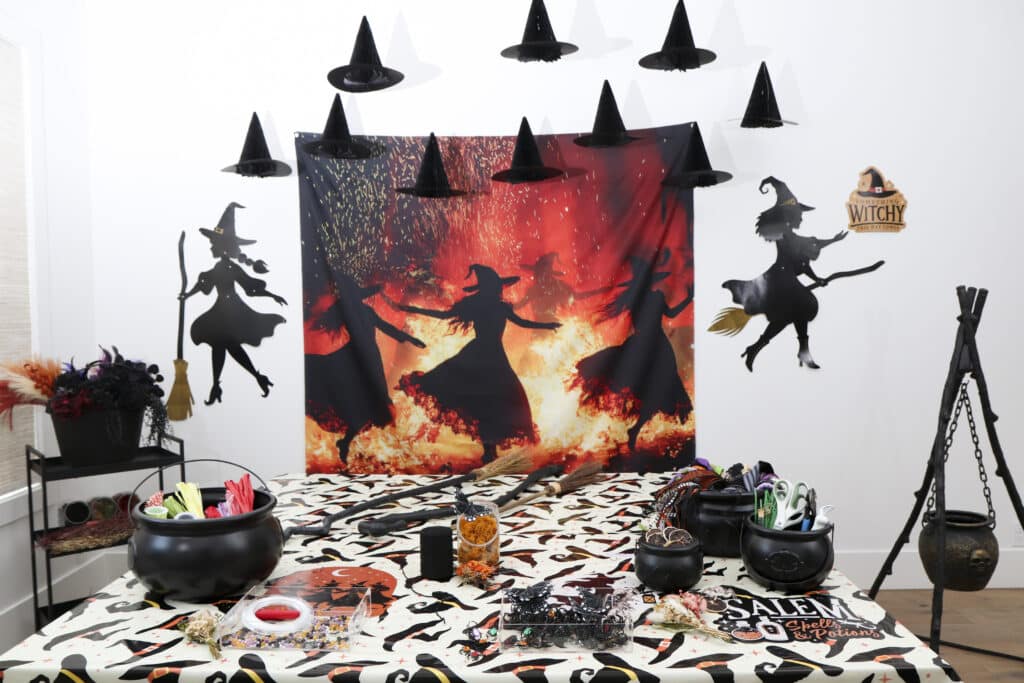
- For the space itself: A witch-themed tablecloth and a backdrop or focal wall element to set the vibe.
How to Set Up a Broom Making Party Station
Step 1: Set the Table First
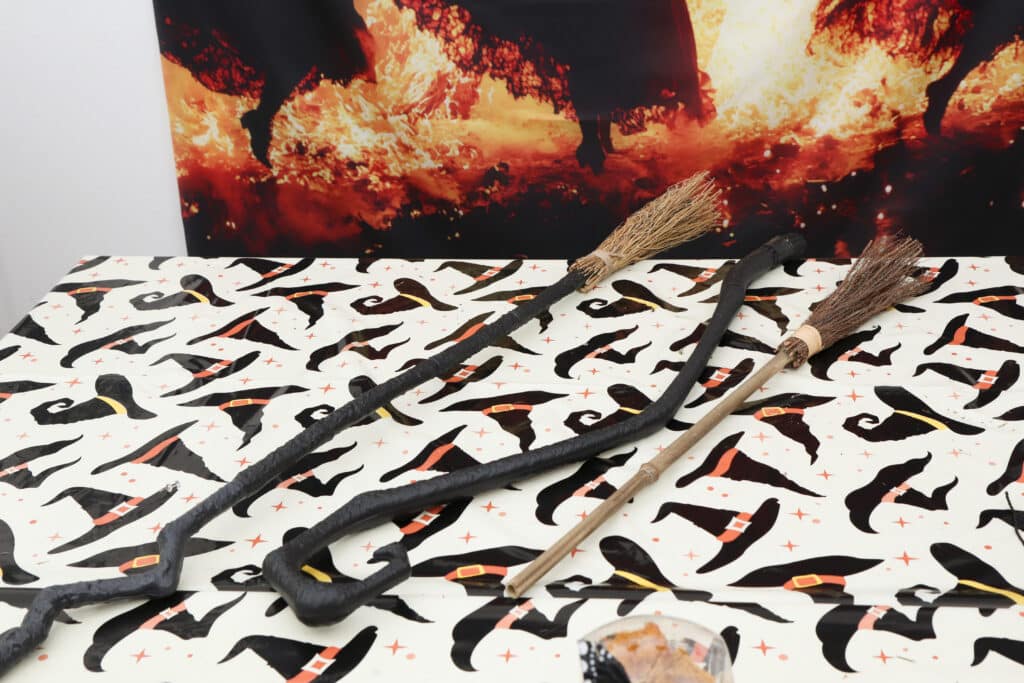
Start with the table itself. A witch-themed tablecloth e.g. a witch hat print is an easy choice — does a lot of work for very little effort. Not only does it set the tone before anyone’s even sat down, it saves you from scrubbing hot glue off a bare table later and helps with easy clean up. Just wrap debris up in the tablecloth and throw the entire thing out!
From there, set out a selection of base brooms (with or without) the bristles already attached; mixing plastic handles with wood or bamboo ones gives guests some variety to choose from before they’ve picked up a single flower.
Step 2: Set Up the Space to Keep Things Moving
For this craft I recommend working standing up. Pulling the binding tight takes some muscle, so skip the low coffee table. A kitchen island, table or workbench gives you the height and leverage you actually need.
Prep the floor first. This craft can get a little messy, clipping off twigs, using leaves and dried florals. Consider laying down a drop cloth.
Step 3: Pick a Backdrop That Sets the Mood
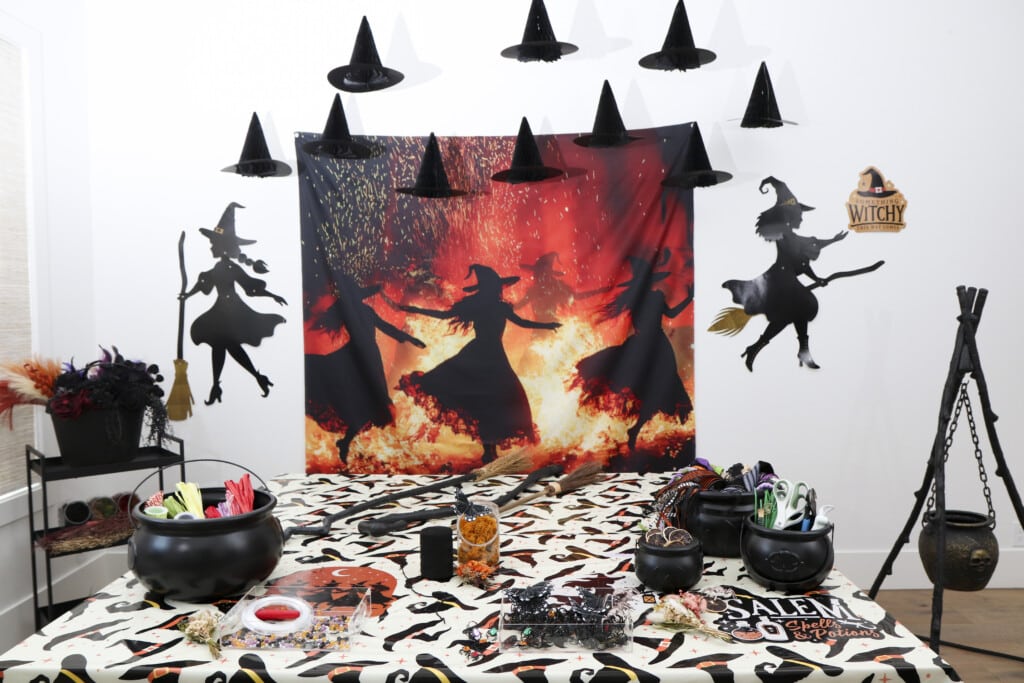
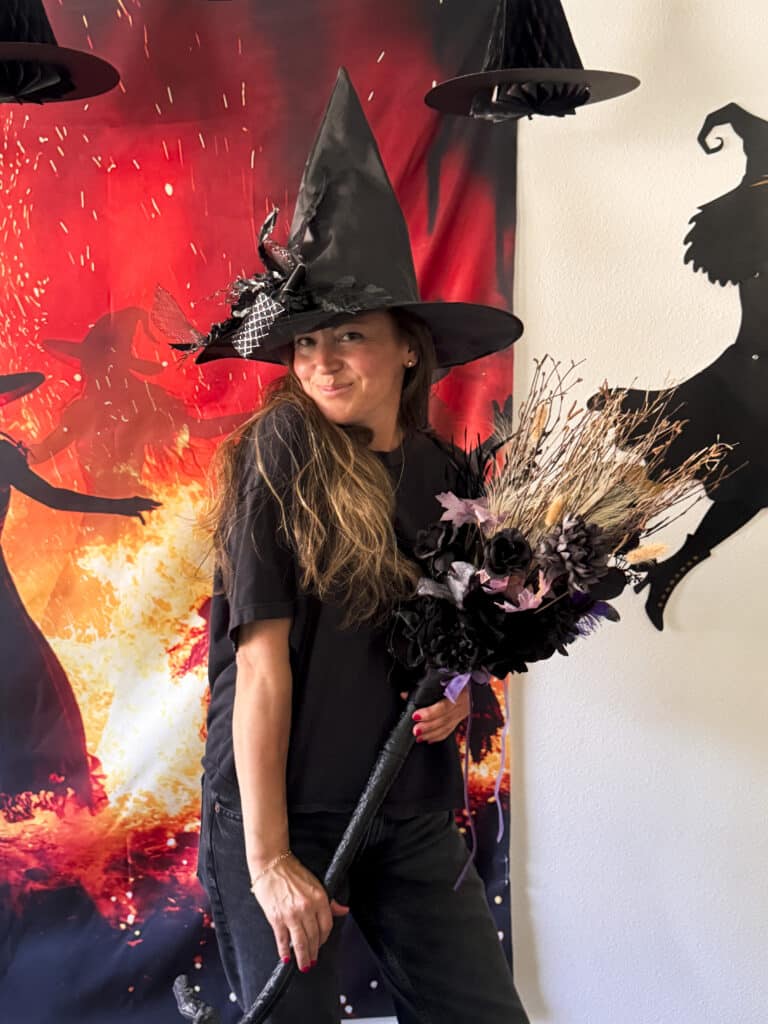
Give the space a focal point too. I hung a backdrop of witches dancing around a fire behind the table, and it turned into the unofficial photo booth for the entire night — there’s something about a flame-lit scene that makes people want their picture taken in front of it.
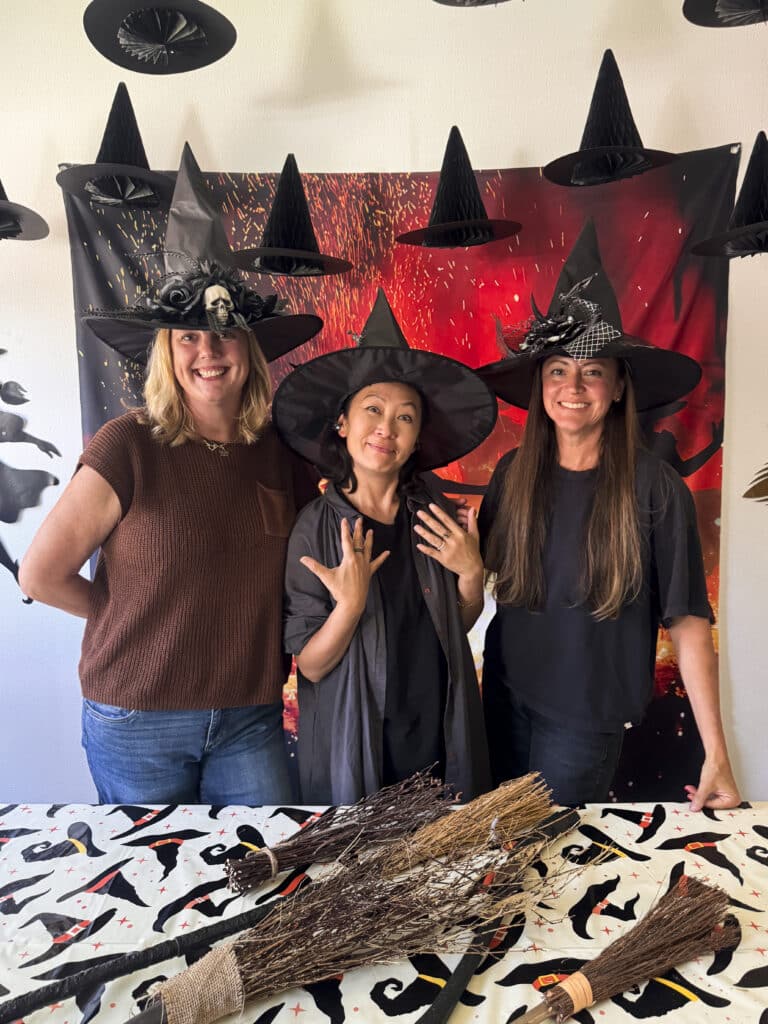
A curtain or a length of fabric in your party’s colors works just as well if a backdrop like this one isn’t in the budget; the goal is simply to give the space a clear visual anchor.
The kit I choose also had a set of honeycomb witch hats that I hung from the ceiling using a push pin and fishing wire. In addition to some nostalgic jointed witch decor. These are lightweight and made of cardstock so were easy to hang using blue-tack. Blue-tack is one of my favorite hacks for hanging on walls with no damage! Reusable and affordable!
Step 4: Build a Supply Station
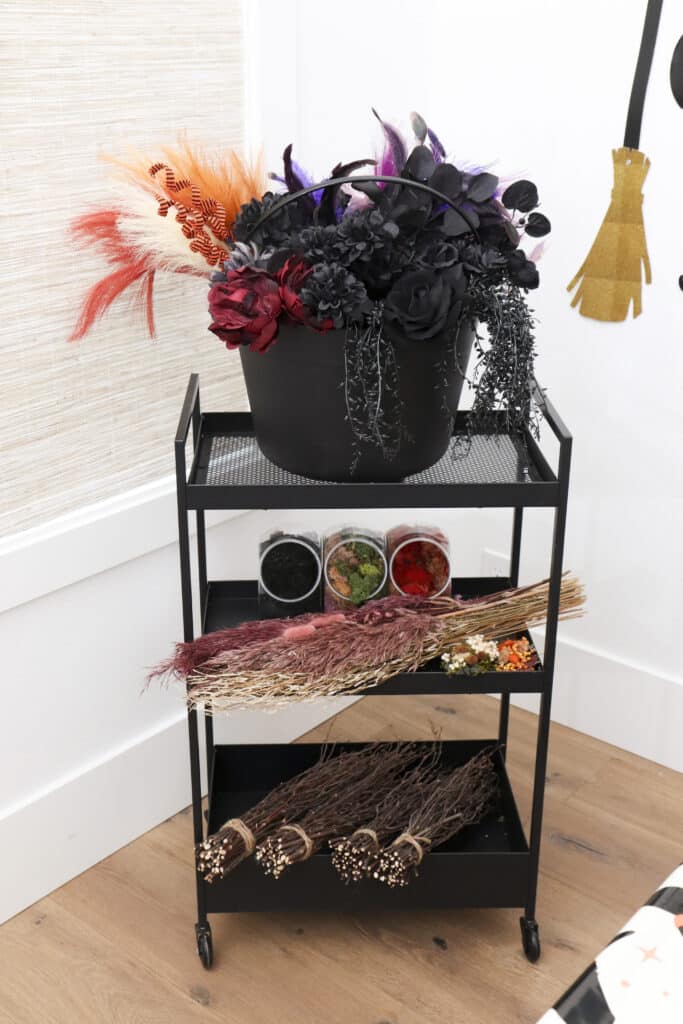
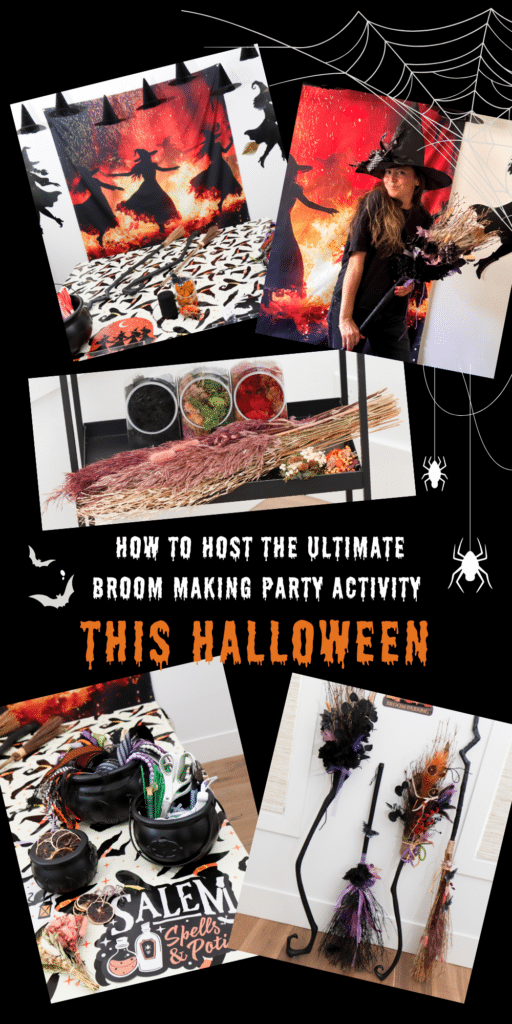
Somewhere to display the bulkier supplies matters too. I used a three-tier cart, with birch twigs (for filling out any broom that needs more fullness) on the bottom level, dried grasses and moss on another, and a cauldron of faux floral stems, floral picks and feathers rounding out the last.
Grouping supplies this way meant guests could see everything at a glance instead of digging through one crowded table, and it kept the actual work surface clear.
Step 5: Fill Cauldrons With Decorating Materials
Smaller supplies need their own homes so guests can actually dig through them instead of hunting across the whole table. I split my supplies into nesting cauldrons: ribbon and fabric strips in one, small tools in another, and dried fruits in another.

For the tiny embellishments — charms, beads, crystals, jewelled spiders — I used clear trays. These worked best for people to visually see all the options and are the details people spend the most time picking through.
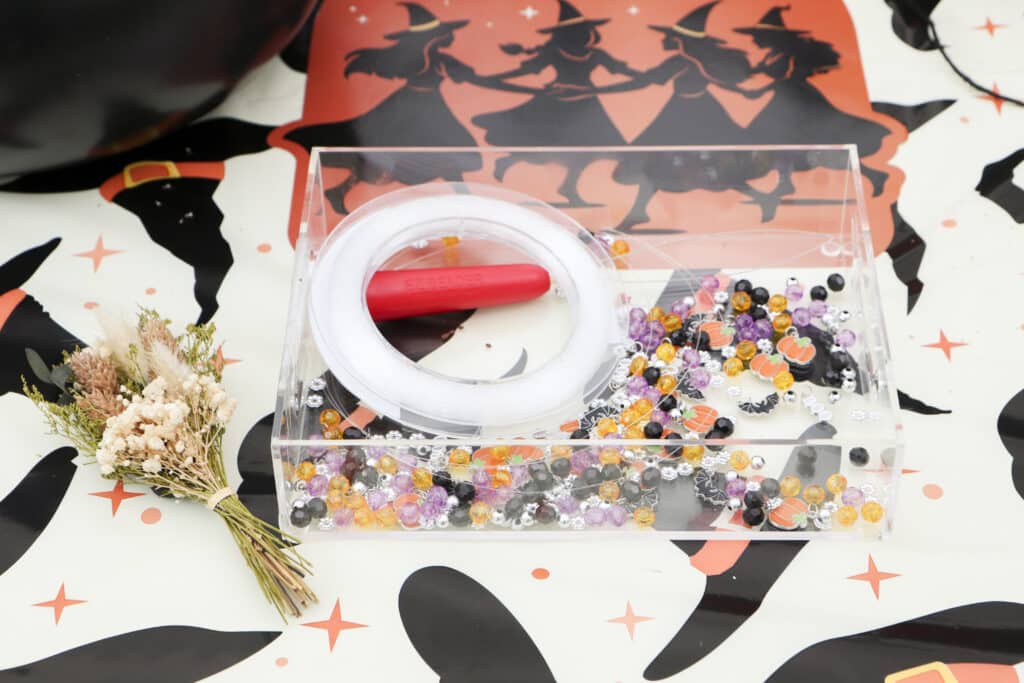
If you’re worried about guests overthinking their choices, labeling each cauldron or tray helps — sometimes just knowing where to look is enough to get people started.
Step 6: Plan Your Party Schedule Around the Activity
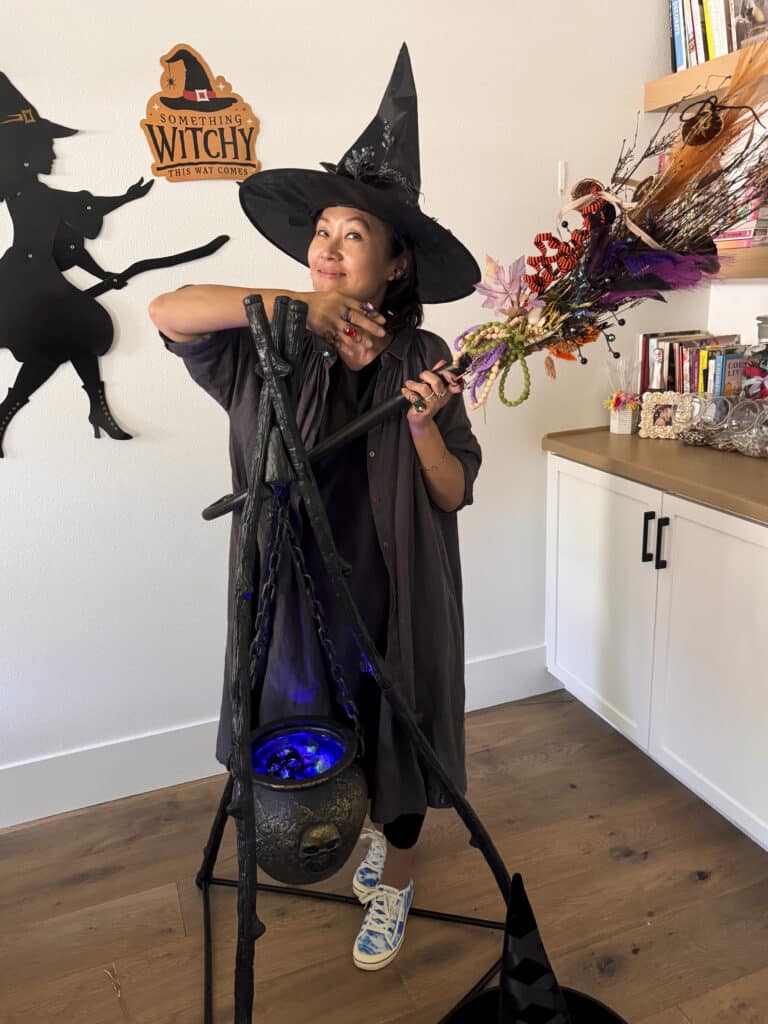
Set the scene before anyone arrives. Light candles, put on music, and turn on any light-up elements before your first guest walks in (like this fun cauldron! perfect for posing with our finished brooms and casting a spell or two!)
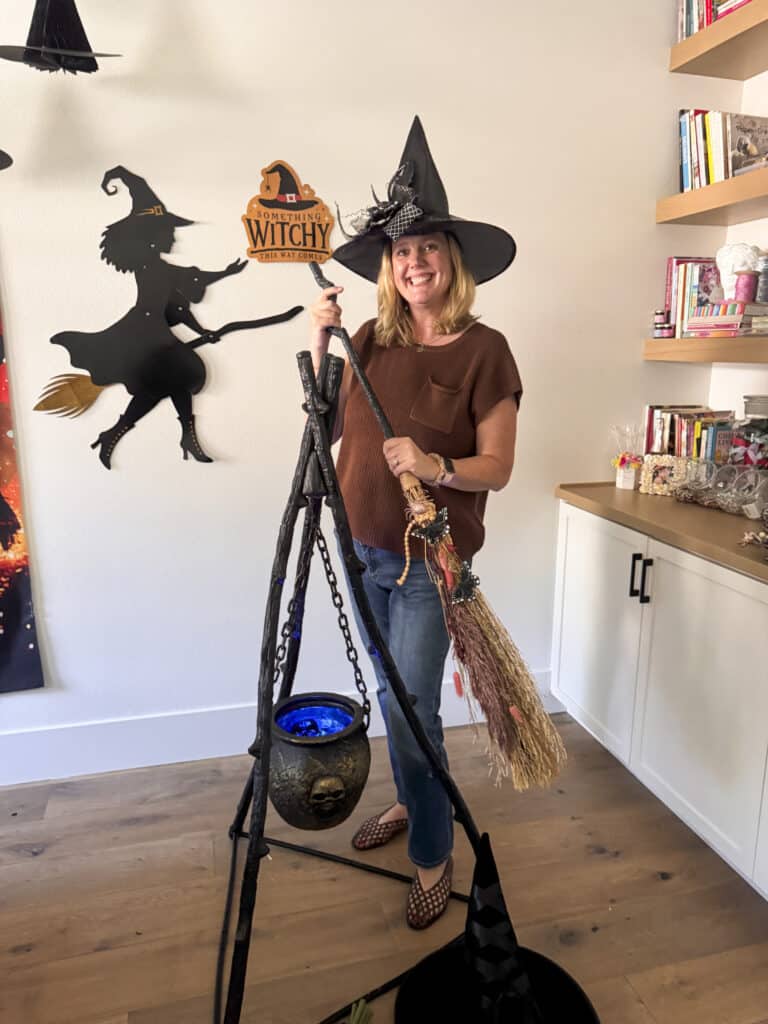
Walking into a fully dressed space is the difference between a party and an experience. Make the broom making the anchor activity, not an afterthought — build the schedule around it: drinks and nibbles first, then broom making as the main event, then dinner with the finished brooms displayed behind you. This order matters more than it seems, since starting the activity while everyone’s still getting comfortable tends to fall flat compared to letting drinks and conversation warm the room up first
Step 7: Style a Broom Parking Display for Photos
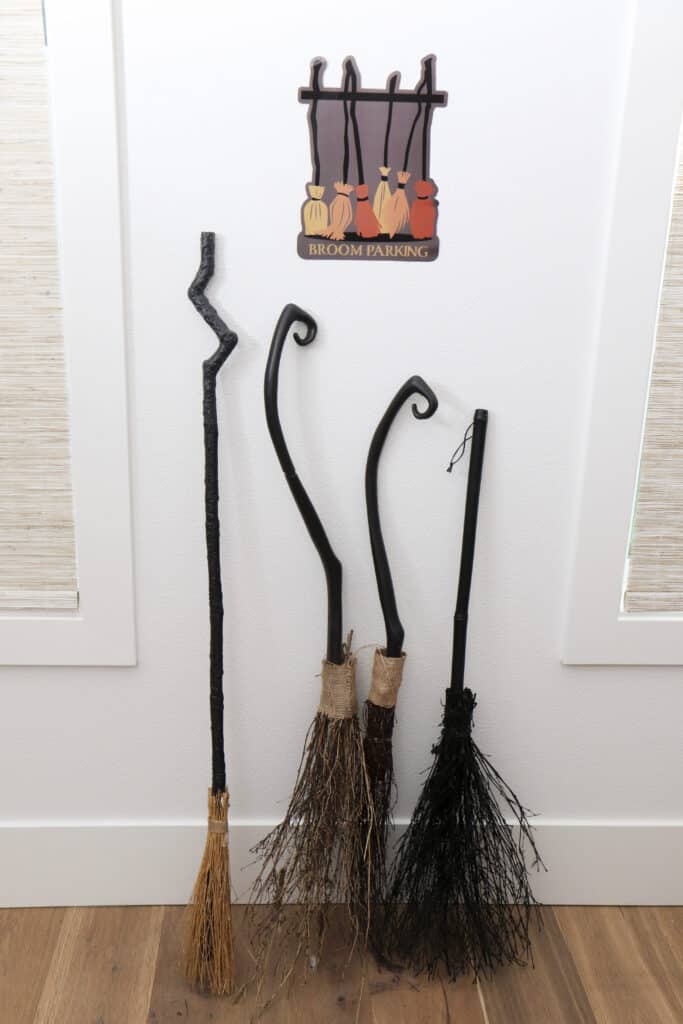
Finally, give the finished brooms somewhere to live for the rest of the night. I hung a Broom Parking sign against a plain wall and lined up all four finished brooms underneath it.
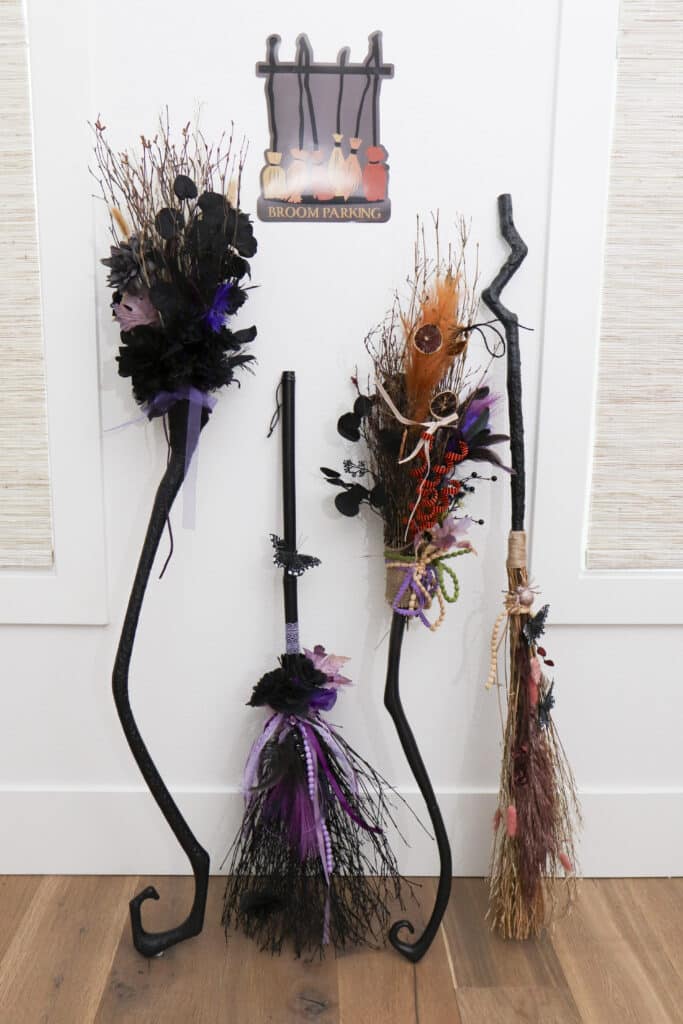
For an extra photo moment, like I mentioned above, I added a cauldron that bubbled and lit up for each guest to pose in front of with her broom. This is also a good moment to have your camera ready, since the display naturally pulls people in for photos without you having to ask!
How to Make Your Own Witch Broom, Step by Step
This is the actual technique, whether you’re working from a pre-made base broom or building the bristle bundle entirely from scratch
Step 1: Start With Your Base
If you’re building from scratch rather than starting with a pre-made base broom, gather twigs or dried grass stalks of a similar length and bundle them evenly around one end of a straight branch or sturdy stick.
Secure the bundle with a floral wire, a zip tie or rubber band a few inches up from the bottom edge, tight enough that nothing shifts once you start wrapping.
If you’re starting from a pre-made base broom instead, the bristle head is already built for you — skip ahead to adding fullness and covering the wrap below.
Step 2: Add Structural Fullness Before You Decorate
Tuck extra birch twigs or dried stems into the bristle bundle for fullness, spacing them evenly around the outside, before adding any florals. This applies whether you built your bundle from scratch in step one or you’re working with a pre-made base broom — either way, a fuller base makes the finished broom look intentional rather than sparse.
Decorating a bundle that’s too thin makes it much harder to build up a full look later, so it’s worth getting the base right first.
Step 3: Layer In Your Florals, Largest First
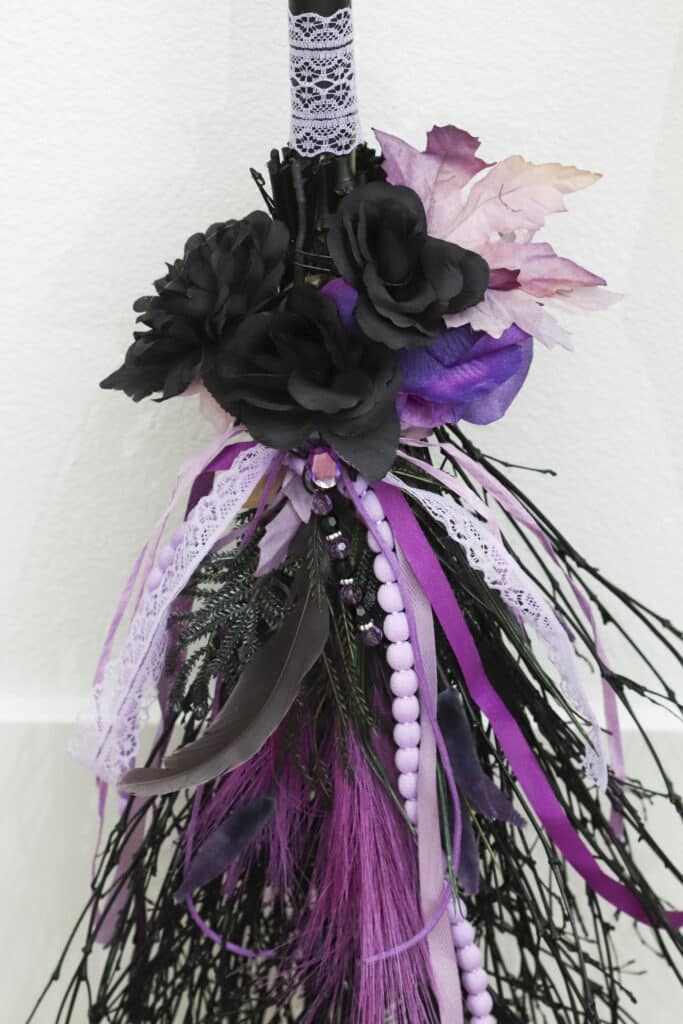
Now add the decorative filler. Start with your biggest floral or feather pieces and tuck the stems into the bristle bundle around the handle, or on top of the bristle bundle as a feature. Working your way around the full circumference, or just decorate the front. The options are endless.
If you’re working with a pre-made base broom, tuck the stems the same way, a couple of inches down into the existing bristles, or layer on top of the bristles.
Fill any gaps with smaller dried or faux pieces once the large elements are placed, and secure everything with floral wire before it gets covered. For anything that won’t hold on its own — especially heavier pieces like a large dried rose or a cluster of feathers — a small dab of hot glue or a twist of floral wire underneath the bristle line keeps it from working loose once the broom gets picked up and carried around.
Get all of this in place before you wrap the join in the next step — it’s much harder to tuck stems in once the wrap is covering the base.
Step 4: Cover and Secure the Wrap
If you built your bundle from scratch, wrap twine several times around the rubber band, floral wire or zip tie to hide it completely and reinforce the join. Once you’ve done this you can get creative with the wrap and decorate it with ribbon and pretty accents.
If you’re working from a pre-made base broom, this is your moment to deal with the existing wrap instead. A lot of store-bought brooms come covered in a plain hessian or burlap that doesn’t exactly scream Halloween — you can leave it as your base layer or wrap right over it with ribbon, lace or a Halloween-print fabric in whatever palette you’re going for.
Either way, wire and floral tape do their real work underneath the visible wrap, so the whole bundle stays put once the broom is finished. Then you get to make it pretty with the decorating supplies!
Step 5: Decorate the Handle
Optional: Wrap ribbon, twine or lace tightly from the top of the bristles up the handle to your preferance. This is where you can also add butterlies, spiders, crystals and more to the handle.
Step 6: Add the Finishing Touches
Tuck in charms, beads, dried citrus or spell pages last, since these small details are what make each broom feel individual rather than assembled from a kit.
Trim any bristles or stems that are still too long once everything is secure.
If you want to hang the finished broom for display or storage, wrap a few extra inches of twine around the top of the handle and leave enough slack to loop it before you tie off.
Tips for Hosting Your Own Broom Making Party
Set the scene before anyone arrives. The atmosphere of this party is everything! Put on some witchy music, and turn on the light-up elements before your first guest arrives. Make is an immersive experience.
Make the broom making the anchor activity and build the schedule around it. Drinks and nibbles first, then broom making as the main event. Finish with dinner at the witch table with finished brooms displayed behind you. Don’t forget to have some fun with photos of the finished brooms.
Practical broom making tips:
- Wire and floral tape underneath the twine wrap keeps everything from shifting later. It’s the one step people skip, and it matters most.
- Keep the cauldrons within arm’s reach of the whole table so nobody has to get up mid-project.
- If you’re short on space, a rolling cart works just as well as a full table setup.
- Have a bag or box ready per guest for broom transport home
- For a larger group, run two smaller supply carts instead of one so nobody’s waiting to grab what they need.
- If you are foraging sticks look for straight, sturdy sticks like dried hazel, birch, or oak. Cut them ahead of time if necessary, to approx 4-to-5-foot. Ensure they are clean and free of loose bark.
- Consider providing or having guests bring work gloves to prevent blisters from tight twine tension and splinters from the wooden handles.
Sparking creativity:
Make the broom making activity open-ended. Broom making works best when there are no instructions and no right answers. Set out the supplies, show a few finished examples and then step back.
Giving guests creative freedom is what produces the most beautiful results and the most joyful experience. No two brooms need to match, and that’s the point. Skip pre-planned color schemes and let guests choose freely.
Provide each guest with a witch hat! A personalized hat makes guests feel like part of the coven and they make party photos even better! You can even decorate a plain hat yourself for the extra special handmade touch.
Broom Making Party FAQs
What supplies do I need for a broom making party?
You’ll need base brooms, birch twigs or foraged stems, dried grasses and faux florals, ribbon and twine, plus floral wire and tape and a handful of small embellishments like charms and dried fruit. Because the technique is simple, you don’t need anything specialized beyond what’s already at most craft or party stores. Let your imagination run wild and have fun foraging.
For my full supplies list check HERE.
How do you keep a DIY broom from falling apart?
The trick is wiring the base of your florals to the handle before you wrap it with twine. This step happens underneath the visible wrap, so it’s easy to skip, but it’s what keeps the broom intact once it’s finished. Zip ties are also your friend!
Can kids or teens do a broom making activity?
Yes, this works well for tweens and teens. Although they may need light supervision around the wire and securing step. It’s also a strong option for a sleepover or a craft-focused birthday party. I’d definately include more BLING if its for the younger crowd.
How many people can you host at a witch broom making party?
The broom making activity works for any group size although I’d recommend a maximum of eight inside — enough for a full coven feeling without losing the intimacy. For a larger group, set up outside! or set up additional broom making stations and increase supply quantities accordingly. Furthermore the activity itself scales easily — you simply need more base brooms and more supplies.
How long does broom making take at a party?
Plan for 45 minutes to an hour once guests are seated, depending on group size. That’s enough time for each person to build and embellish a broom without feeling rushed.
What’s the difference between a broom making party and a broom making station?
A broom making station is one activity within a larger party, while a broom making party can be built entirely around the activity itself. Either way, the same setup and supply list work for both.
Where can I buy broom making supplies?
Practical Magic 2 hits theaters on September 11, 2026. It stars the original witches Sandra Bullock and Nicole Kidman as the Owens sisters. It’s the perfect moment to gather your own coven for a witch party! Take inspiration from everything that makes the original film so beloved. The sisterhood, the magic and of course the midnight margaritas.
I sourced my party supplies, including the base brooms and backdrop from Oriental Trading, the complete list is HERE. My craft and decorating supplies as well as my tools come from both Michaels and Amazon. You can find my list of craft supplies HERE. Most craft stores also stock the supplies I have listed. Flower markets are also a good option if you’d prefer fresher “ingrediants”. Foraging the woods is also a solid option!
Do I need a pre-made base broom, or can I build one from scratch?
Either works. A pre-made base broom saves time and works well for a group setting. Building your own bristle bundle from twigs or dried grass around a sturdy branch gives you full control over shape and size, and costs next to nothing if you’re using materials from your yard.
Do I need a party theme to host a broom making party?
No, though a witch or Halloween theme makes the styling easier. The activity works just as well as a standalone craft night, with the brooms as the focus rather than a supporting element.
Shop the Full Party
For a shopping list of party decor supplies visit my full list HERE.
You Might Also Like
You can find the full party set-up where we made brooms here: How to Host a Practical Magic Inspired Witch Party — all the details you need for creating a Practical Magic appreciation or watch party. For a witch-themed potion bar you can drink from while broom making head here: Witch Party Potion Bar (coming soon).
And for more Halloween party ideas check out my Halloween Sip N Paint Gothic Drawing Room Party (coming soon). Or decorate your house with inspiration from my Witch-Themed Halloween Home Entryway.
Happy Partying!
As a blogger, I sometimes receive compensation and/or products in exchange for my styling and crafting services. I also may earn a small commission from any sales that result from affiliate links on this page. As always, all project ideas and any opinions expressed here are my own. For further information on our disclosure policy please check out our disclosure page.











Leave a Reply